The only thing cuter than a decorated sugar cookie is a bite sized sugar cookie! Make these tasty cookie bites with the kids this holiday season. Don’t forget the frosting!
If you love putting frosting on cookies, be sure to give these Frosted Sugar Cookie Bars a try too! Or these sweet Caramel Frosted Sugar Cookies are always a hit!
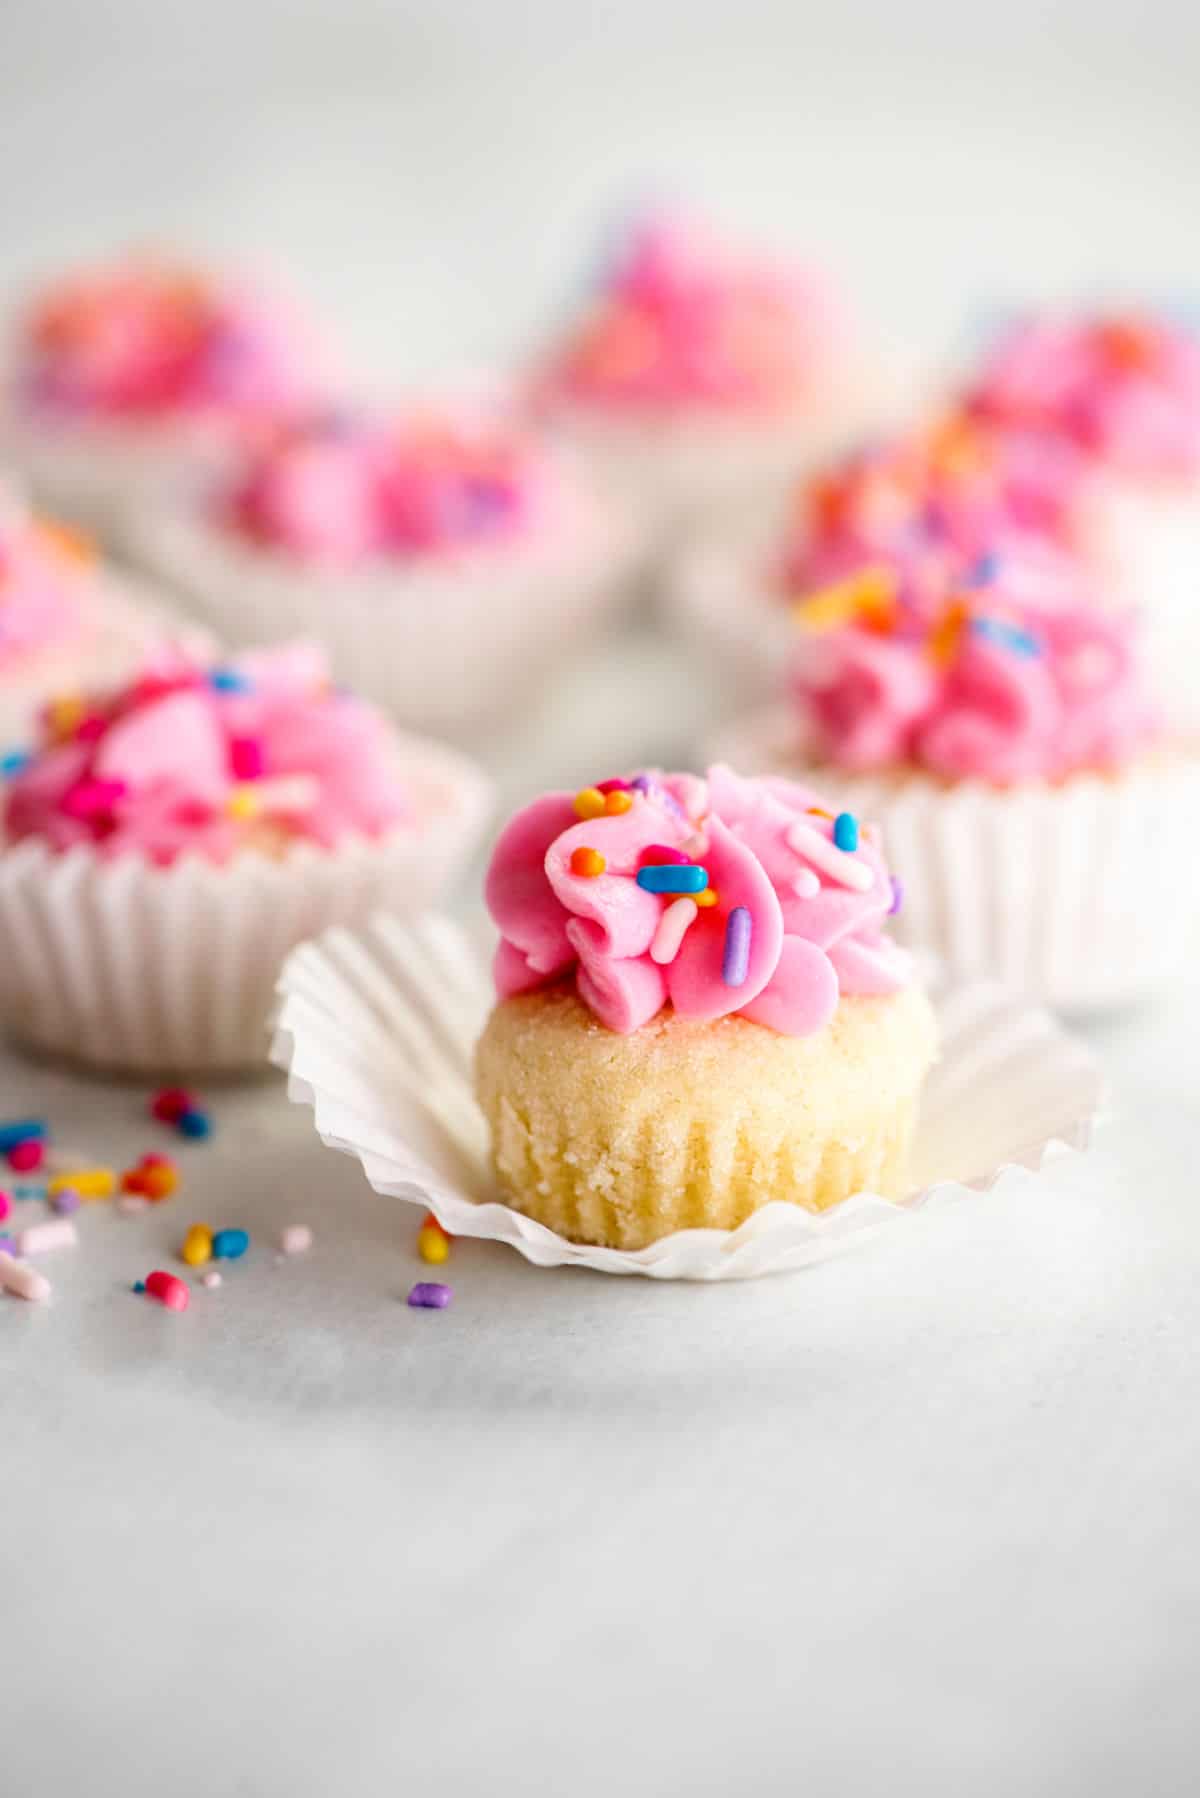
Bite Sized Sugar Cookies
Christmas isn’t Christmas without sugar cookies! The festive frosting colors, the sprinkles, the sharing with friends, it’s all one of my favorite ways to celebrate the season.
I’ve shared plenty of sugar cookie recipes over the years, from Cream Cheese Sugar Cookies to these classic Chewy Sugar Cookies, and today I have yet another one to add to your list: Bite Sized Sugar Cookies
Advantages
Wondering why you should make sugar cookie bites instead of regular ol’ normal sized cookies? There are a few reasons I like making these itty bitty treats:
- No cutting out cookies: No cookie cutters required for this recipe! When you’re in a hurry or don’t want to have to get the counters messy, Sugar Cookie Bites are the way to go.
- Easy to share: One batch of these bites is enough to share with a group! Smaller cookies also mean you can have MORE of them, right? Baked in individual wrappers, they’re extra easy to transport and serve.
- Easy to store: These little cookies don’t take up much space. Keep ’em in the cookie jar, a tupperware container or a ziploc bag so they’re on hand any time you need a bite of something sweet.
Ingredients Notes
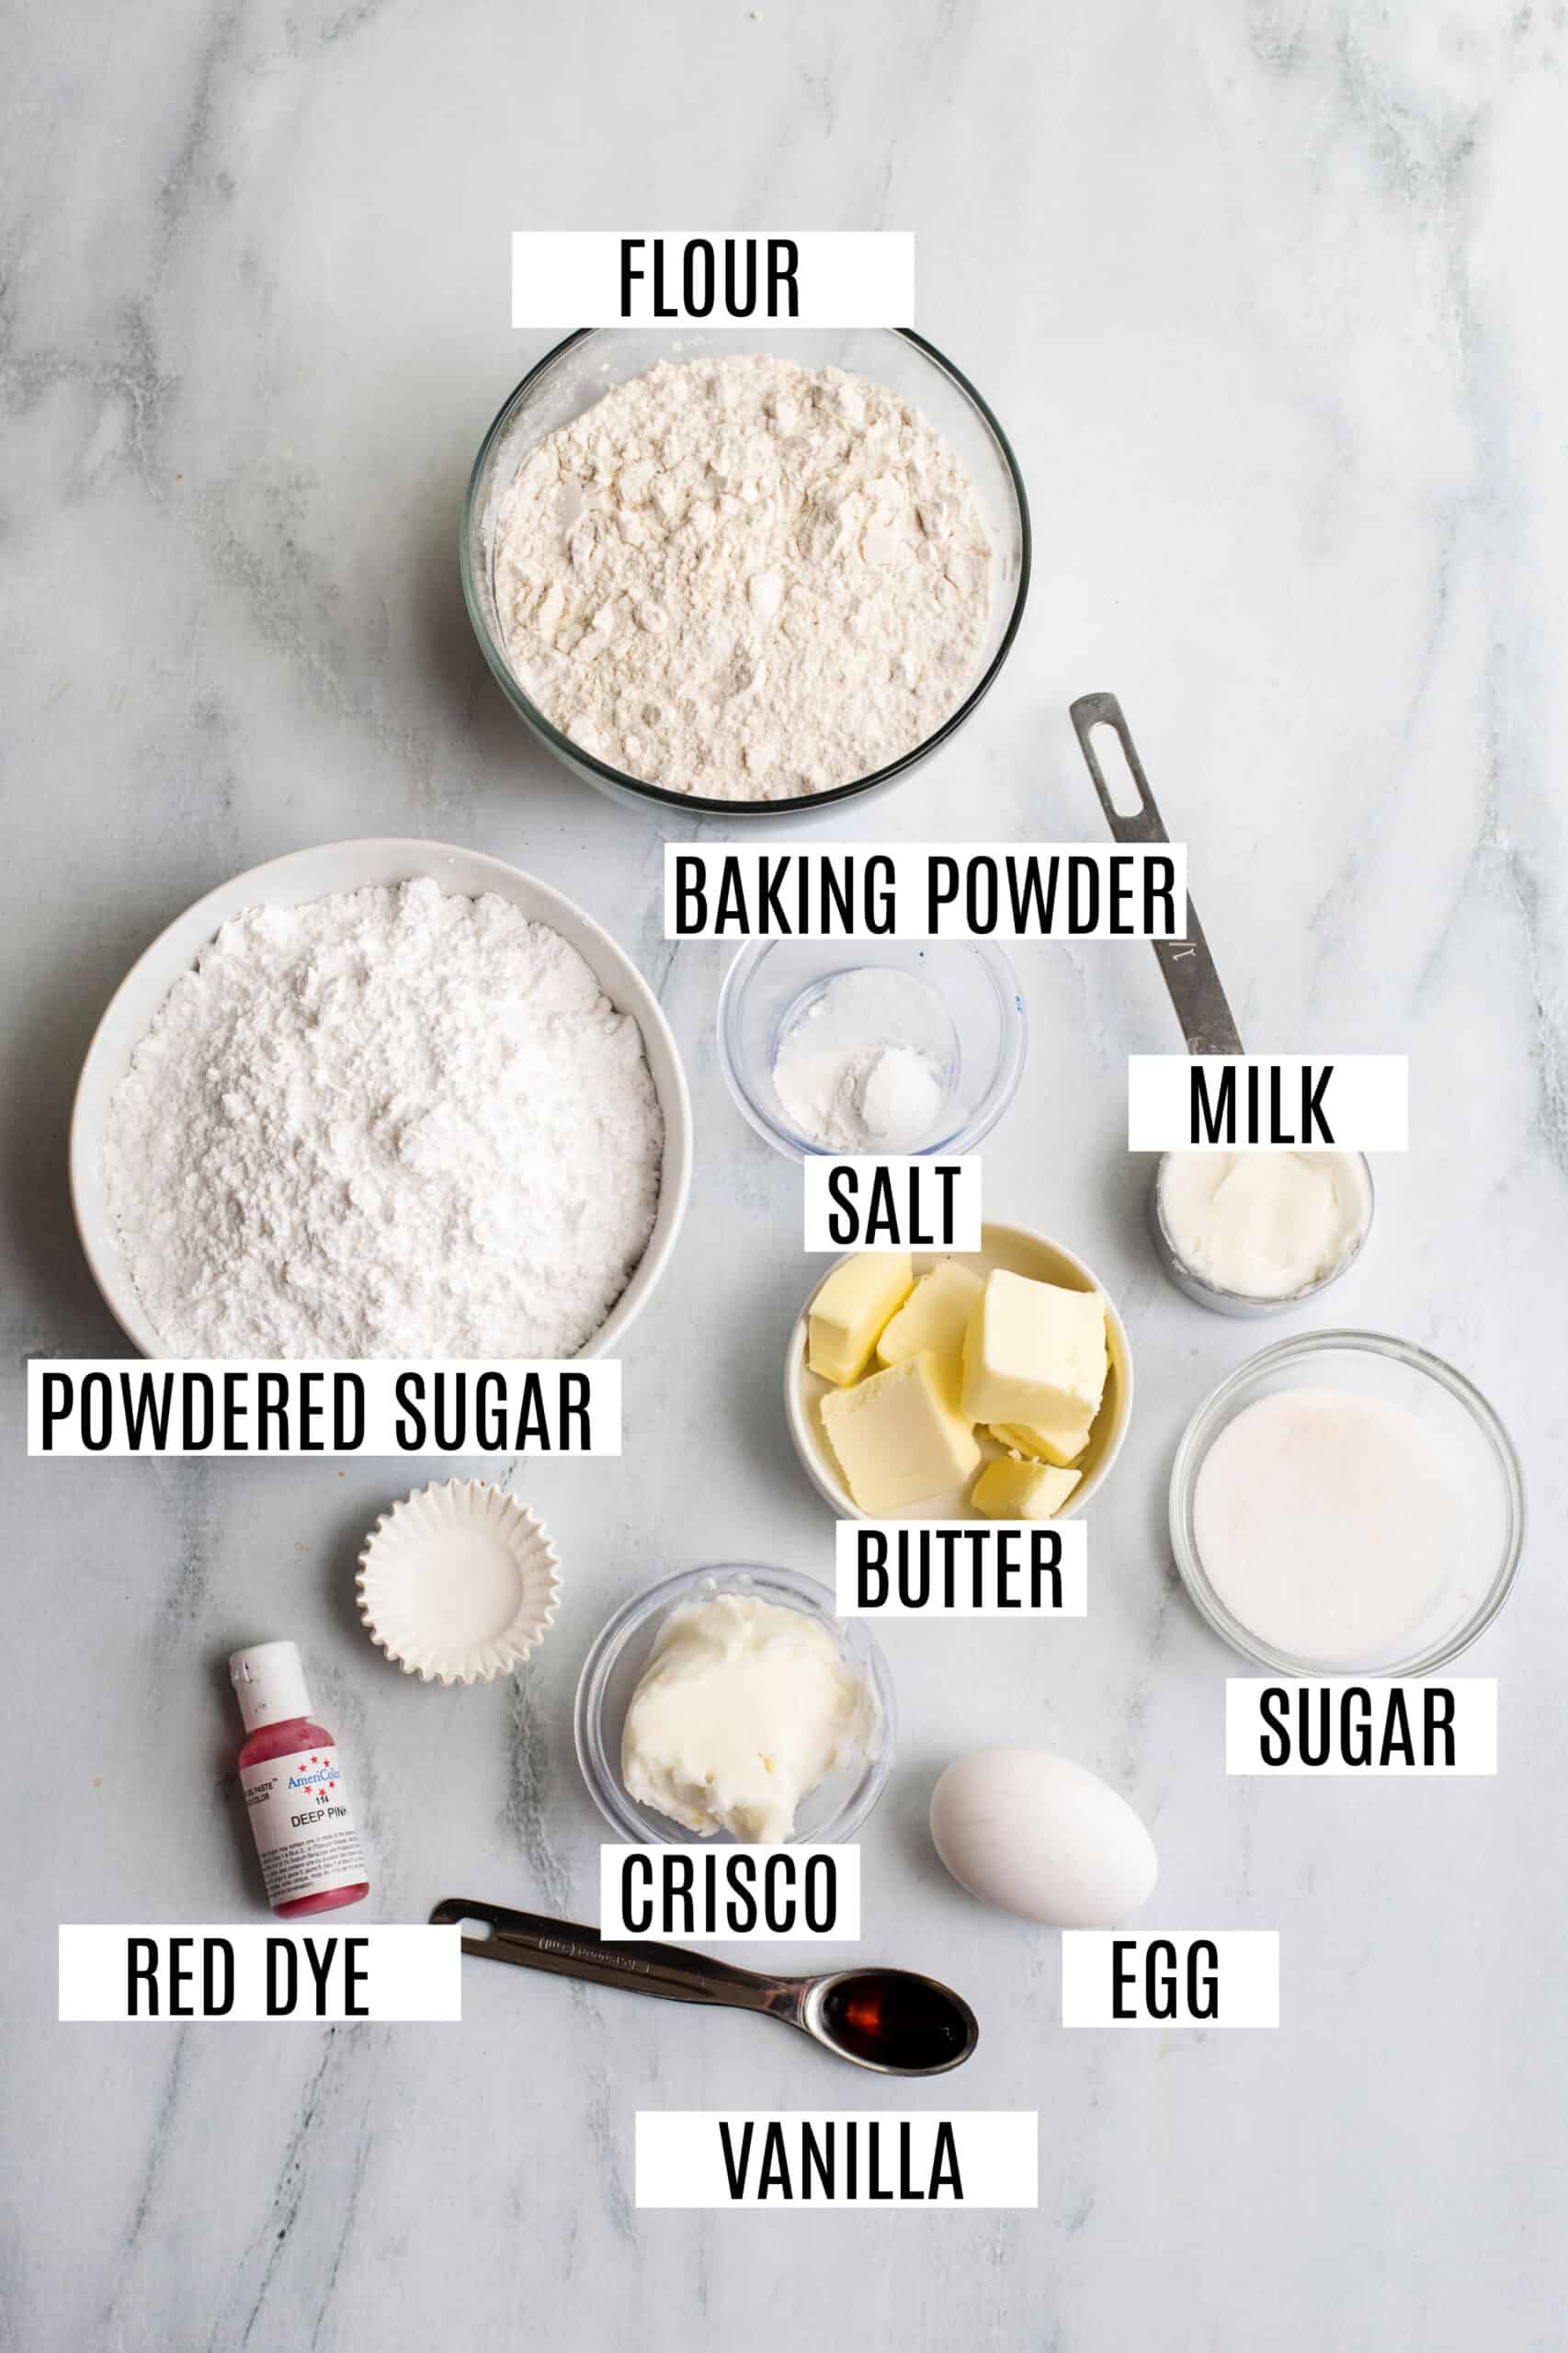
Just like most sugar cookies, you can adapt the frosting, sprinkles and other decorations for any occasion!
This recipe features a basic sugar cookie frosting that you can make as written or fancy up with a few drops of food coloring.
Get creative and have fun with all kinds of color combos.
Step by Step Instructions
Before you make the cookies, preheat the oven to 375 F and line a mini muffin tin with small cupcake liners.
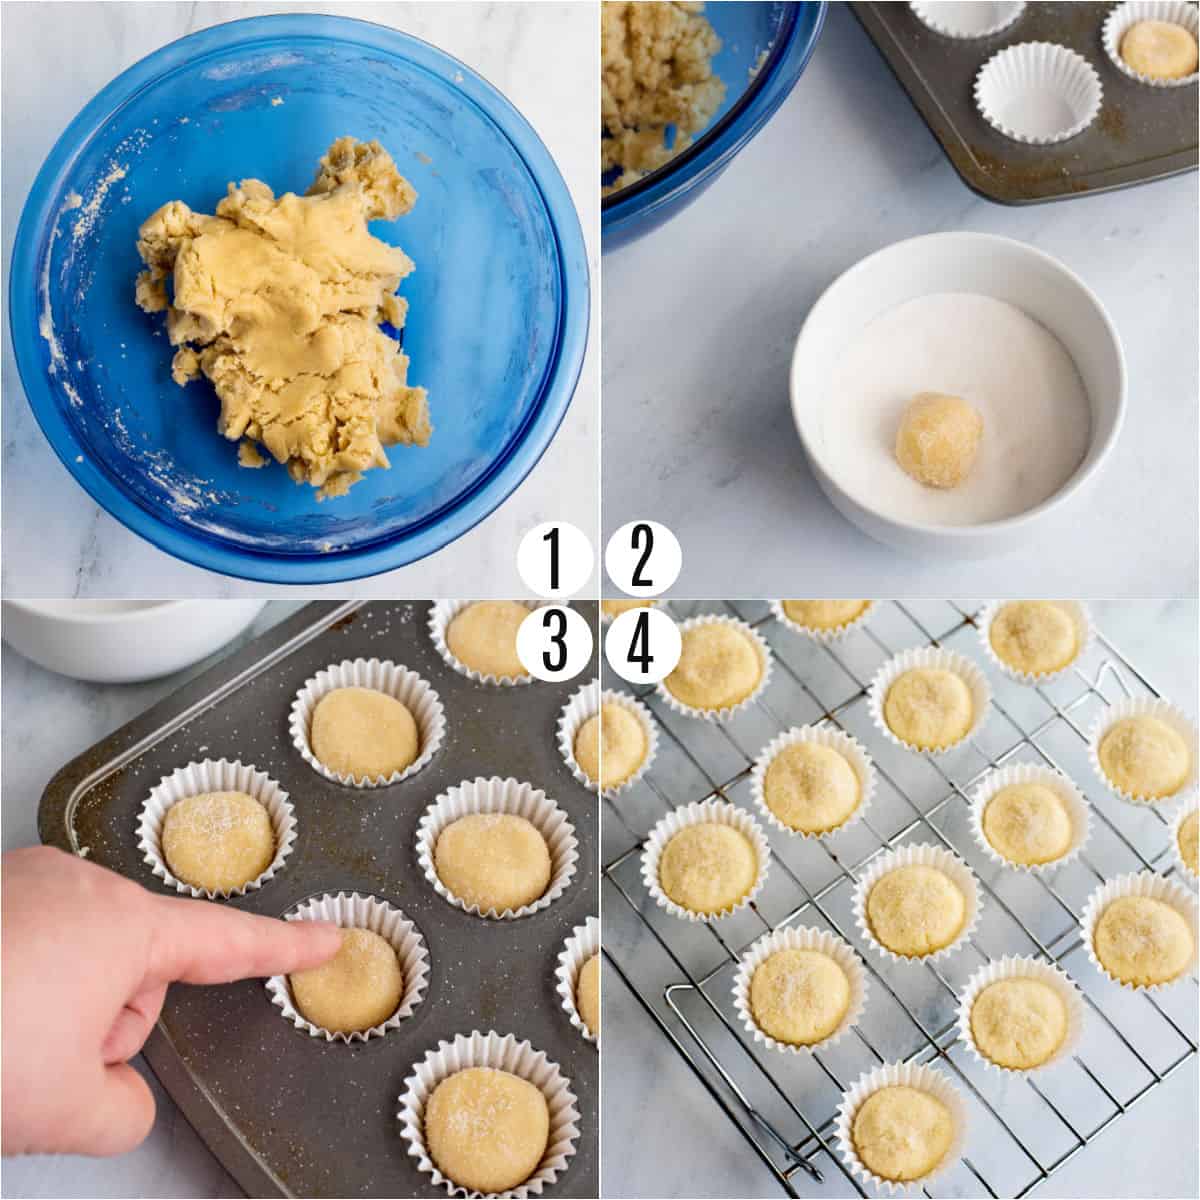
STEP 1. Make the cookie dough
In a large bowl or stand mixer, beat together the butter, shortening and sugar until it’s smooth and creamy, then add the vanilla extract and egg.
In a small bowl, whisk together the dry ingredients. Slowly incorporate the flour mixture into the wet ingredients and stir to form a dough.
STEP 2. Roll in sugar
Roll about 2 teaspoons of dough into a ball. I used a small cookie scoop about the size of a walnut. Roll the ball of dough in a small bowl of sugar, coating all sides, and place it in the muffin pan inside of a mini cupcake wrapper.
Gently press down on the tops of the cookie balls so they spread to the edges.
STEP 3. Bake
Bake the cookies for 10-11 minutes. The color of the cookie won’t change so you can test when they’re done by sticking a toothpick into the center to see if it comes out clean.
Allow the cookies to cool for a minute in the pan then move the cookies to a cooling rack. While the cookies are cooling, prepare the frosting.
STEP 4. Frost
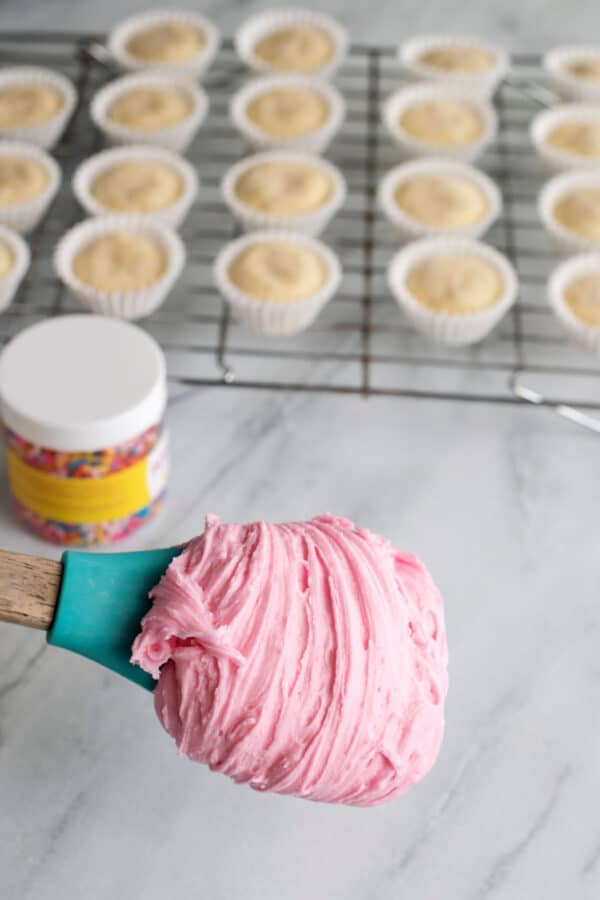
Combine the powdered sugar and shortening in a stand mixer or large bowl with beaters until combined (the mixture will be a little dry and crumbly).
Add in half of the milk, the vanilla and food coloring (is using) and mix until smooth.
If the frosting is too thick, gradually add in the rest of the milk until the desired consistency has been reached.
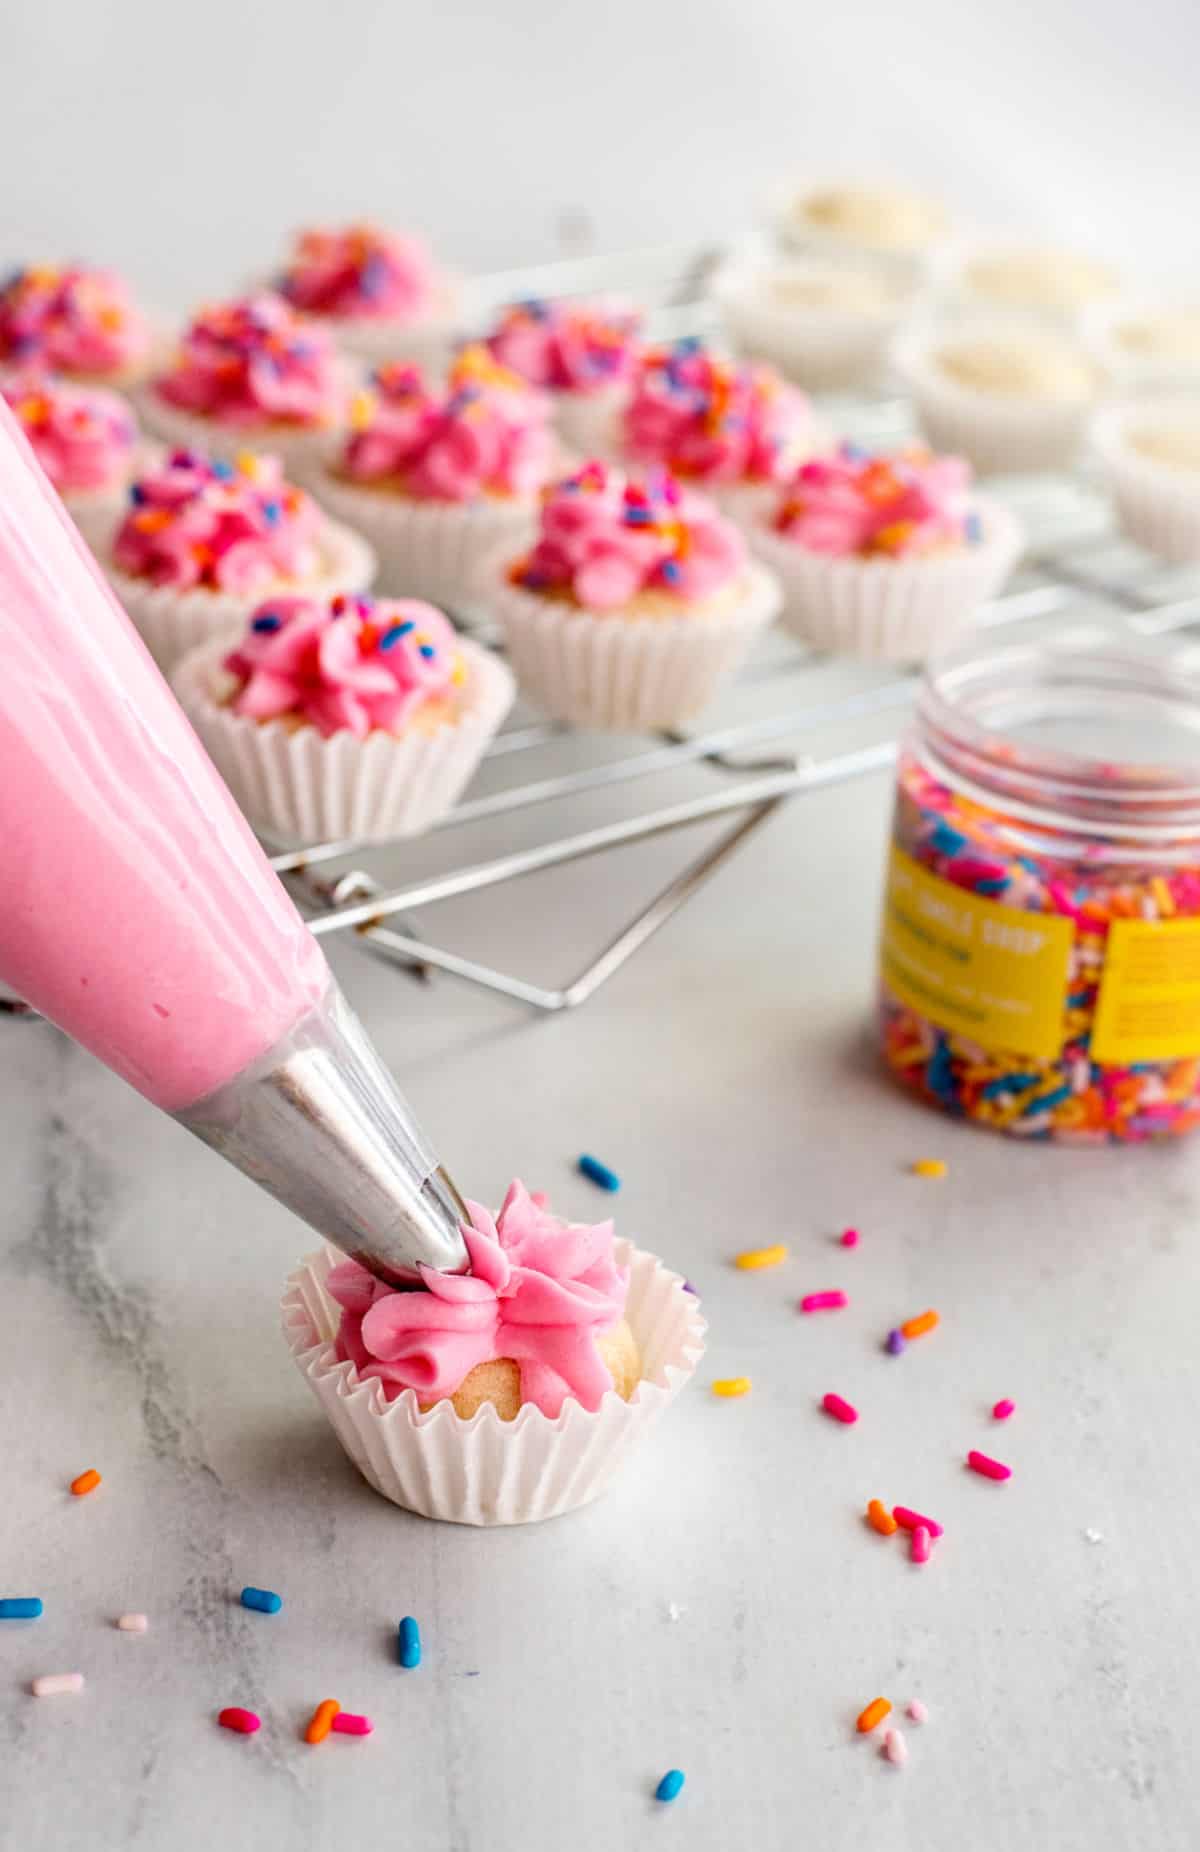
Once the cookies have cooled. Fill your piping bag, or use a knife to spread, and frost the cookie bites with the icing and sprinkle with your favorite sprinkles!
Tips and Tricks
- The shortening in the frosting will allow the frosting to“set”. If you stack the cookie bites they will smoosh a little bit but they will not stick to each other.
- The cookies will puff a little as they bake. When ready to come out of the oven, the tops will look dry. In my oven, this was after about 10 minutes.
- Store sugar cookie bites in an airtight container at room temperature for up to a week. You can freeze these but the texture of the frosting will get a little more runny when it thaws. If you do freeze, consider freezing them unfrosted and letting them thaw before adding the icing.
- Serve your cookie bites with a mug of hot chocolate. These Valentine’s Hot Cocoa Bombs are so fun!
Recipe FAQs
You can use butter if you prefer, however, it tends to spread more than the shortening, so you may want to refrigerate the dough before baking.
Yes you can. However, you may notice the color to run slightly when freezing.
Absolutely. Sugar cookies are great with or without frosting. I suggest if skipping the frosting, add in some fresh lemon zest to the cookie dough.
More Easy Cookie Recipes
- How to Make Macarons
- Chocolate Macarons
- Jam Thumbprints
- Chocolate Chocolate Chip Cookies
- Peanut Butter Cookies
- Snickerdoodles
Pin this now to find it later
Pin It
Sugar Cookie Bites
Ingredients
For the cookies:
- ½ cup unsalted butter softened
- ⅓ cup shortening I used Crisco
- ¼ cup granulated sugar
- 1 egg
- 1 teaspoon vanilla extract
- 1 ¾ cup all-purpose flour
- 1 teaspoon baking powder
- ½ teaspoon salt
- ¼ cup granulated sugar to roll the cookie dough in before baking
For the frosting:
- 4 cups powdered sugar
- ½ cup shortening
- 5-6 Tablespoons milk
- 1 teaspoon vanilla extract
- Food coloring optional
- Sprinkles optional
Instructions
- Preheat oven to 350 degrees. Prepare a mini muffin pan by lining it with mini cupcake liners.
- In a large bowl, using a hand or stand mixer, beat together the butter, shortening and sugar until it’s smooth and creamy. Add egg and vanilla, mixing JUST until combined.
- In a small bowl, whisk together the flour, baking powder and salt. Slowly incorporate the flour mixture into the wet ingredients and stir until dough comes together.
- Grab about 2 tsp. of cookie dough and roll it into a ball. I used a small cookie scoop and it will resemble the size of a walnut. Roll the ball of dough in a small bowl of sugar, coating all sides, and place it inside of the mini cupcake wrapper.
- Gently press down on the tops of the cookie balls so they spread to the edges. If the sugar coating is pressed down into the cookie just sprinkle a little more sugar on the tops.
- Bake the cookies for 10-11 minutes; the tops will not change color. The cookies will grow a little in size. I removed them when the tops didn’t look wet any longer and used a toothpick to confirm they were done.
- Allow the cookies to cool for a minute in the pan, just so you can handle them, and then move the cookies to a cooling rack to finish cooling.
- While the cookies are cooling you can prepare the frosting.
- In a large bowl, using a stand or hand mixer, combine the powdered sugar and shortening; mixing until combined. The mixture will be kind of dry and crumbly.
- Add in half of the milk, the vanilla and food coloring; mix until the frosting comes together and all of the sugar clumps are gone. If the frosting is too thick, gradually add in the rest of the milk until the desired consistency has been reached.
- Once the cookies have been cooled. Fill your piping bag, or use a knife to spread, and frost the cookie bites with the icing and sprinkle with your favorite sprinkles. The shortening in the frosting will allow the frosting to“set”. If you stack the cookie bites they will smoosh a little bit but they will not stick to each other.
- Store covered at room temperature.
Notes
- The shortening in the frosting will allow the frosting to“set”. If you stack the cookie bites they will smoosh a little bit but they will not stick to each other.
- The cookies will puff a little as they bake. When ready to come out of the oven, the tops will look dry. In my oven, this was after about 10 minutes.
- Store sugar cookie bites in an airtight container at room temperature for up to a week. You can freeze these but the texture of the frosting will get a little more runny when it thaws. If you do freeze, consider freezing them unfrosted and letting them thaw before adding the icing.
- Use homemade vanilla extract for delicious flavor!
Nutrition
These little cookies are great for little hands to help make! Everyone has fun choosing their own sprinkle colors and decorating custom miniature cookies.



Made these with white frosting and white edible glitter for my daughter’s bridal shower. Everyone loved them. Have made several more times and changed up frosting colors and sprinkles.
These are so adorable and look so fun to make! My daughter is going to love this recipe! I can’t wait to give this a try!
What kind of sprinkles do you use? I like the color combo..