The easiest ever Homemade Garlic Bread recipe! Learn how to make delicious buttery garlic bread in your own kitchen in no time at all.
Serve up this easy bread with a pot of Spaghetti and Meatballs. Or make my famous Million Dollar Spaghetti Casserole with a side of garlic bread for the perfect weeknight dinner.
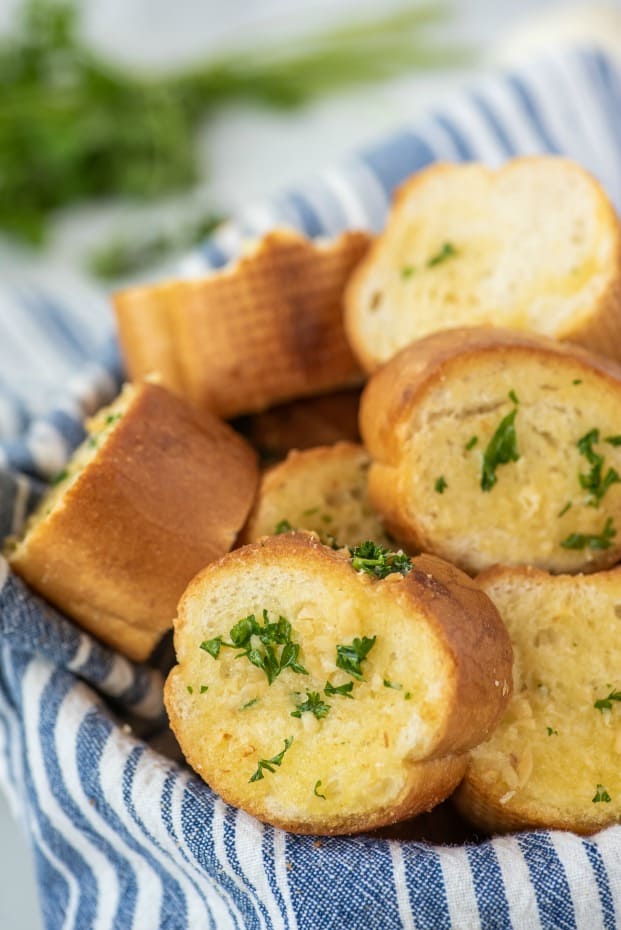
Why this Recipe is Best
Who doesn’t love garlic bread?
No lasagna dinner is fully complete without it in my book and it’s so easy to make your own at home.
This quick and easy garlic bread recipe has served me well for years. I serve it at family weeknight dinners and special occasions alike and everyone loves it.
And because of how easy it is to make there’s no need to fight over who gets the last piece of garlic bread. You can always pop another batch in the oven and have it ready in minutes.
This is my go-to no frills garlic bread. Covered with garlic butter and olive oil and sprinkled with parsley, it’s perfect for any occasion.
This semi-homemade garlic bread is just as tasty as the breads from a restaurant–if not more so because you can adapt the herbs and seasonings to suit your preferences.
Once you learn how to make garlic bread at home, you’re going to want to make it all the time! No one will be sad about that–go ahead and make this delicious garlic bread as often as you fancy.
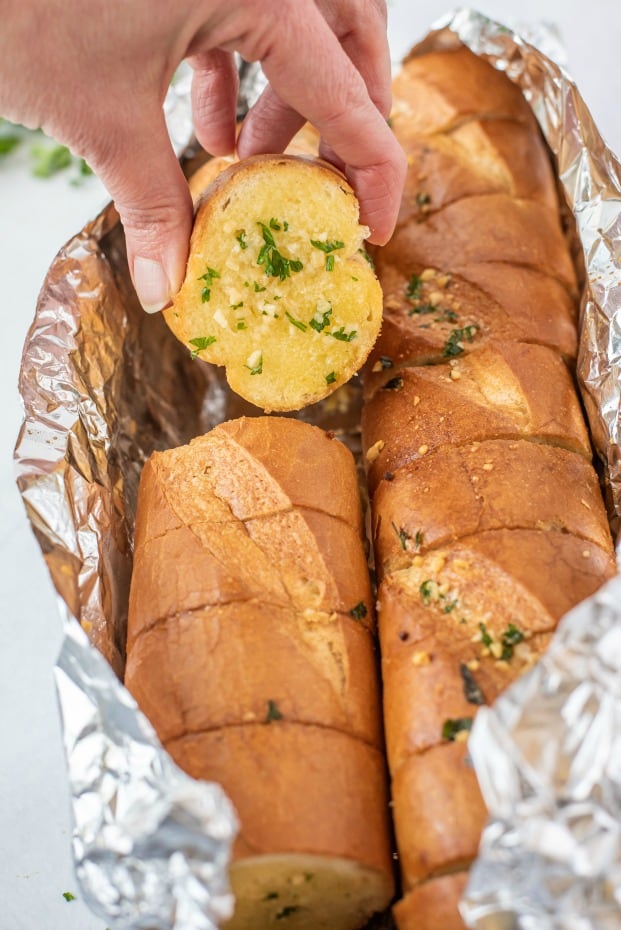
Semi-Homemade Garlic Bread
I use a French baguette for my version. It’s so convenient to just grab a loaf from your grocery store bakery section (or favorite local bakery) but you can also make your own at home if you prefer.
Other types of rustic bread with a hard crusty outside will work well too, like Pain de Campagne or Italian breads.
The long round shape of baguettes is my favorite because it’s easy to cut into single serving slices.
For my Cheesy Garlic Bread recipe, I prefer slicing the whole loaf lengthwise then baking it BEFORE slicing.
In this recipe, I opt to cut the bread into slices first. After baking the bread you can toss it right into your bread basket with some homemade puff pastry breadsticks or onto a serving platter. (Or, honestly, put it straight into your mouth.)
I’ve made garlic breads with all butter and other kinds using all olive oil. I recommend using both oil and butter if you can.
The olive oil brings a wonderful authentic flavor to the bread while the garlic butter gets amazing garlic flavor into every nook and cranny.
A garnish of chopped parsley adds a pop of color and freshness to the bread that I love (but it’s also good without). About half the time, I opt to add a light layer of cheese to the bread, too. It’s delicious both ways!
Step by Step Instructions
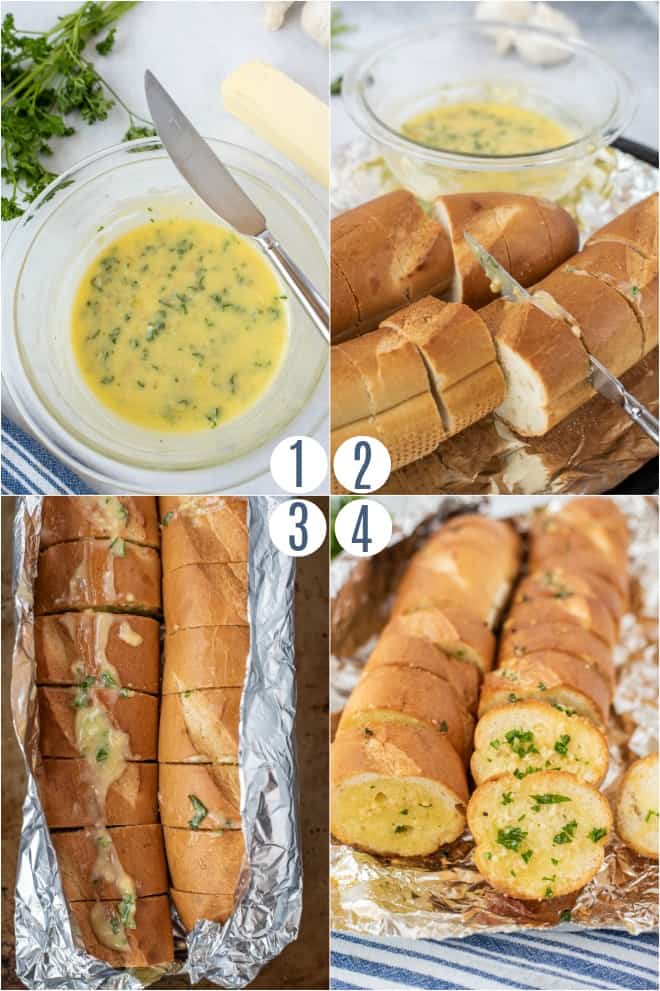
Homemade garlic bread is quicker and easier than most people realize. If you have bread, garlic, butter and oil you can get a basket full of toasty, buttery, garlicky slices of bread on the dinner table in no time at all.
Here’s everything you need for this garlic bread recipe:
- French baguette (store bought or homemade)
- Unsalted butter (softened)
- Olive oil
- Minced garlic
- Parsley (chopped)
- Salt (to taste)
- Parmesan cheese (optional)
To make the garlic bread:
STEP 1. Preheat oven to 375° and line a baking sheet with foil. Slice baguette into 1” slices.
STEP 2. Make the garlic butter spread by mixing together olive oil, butter, garlic, parsley, salt and parmesan cheese (if using).
STEP 3. Spread the butter mixture onto both sides of each slice of bread. Wrap loaf in the foil, leaving the top exposed so it gets toasted in the oven. Pour any remaining garlic butter over the top of the loaf.
STEP 4. Bake until golden brown on top, about 9 to 10 minutes.
Serve warm.
Serving Suggestions
We love this homemade bread with any of our favorite Italian inspired main dishes and its also a great accompaniment to soups like Pasta e Fagioli.
Toss together an Olive Garden Salad and you have a complete meal that’ll have everyone coming back for seconds.
Leftover garlic bread slices is the perfect base for my homemade bruschetta!
Don’t forget dessert tonight! Choose our easy Cannoli or Ricotta cookies.

Tips and Tricks
- You can use a freshly baked loaf for this bread but it also works fine with day-old bread. If you’ve got a baguette from the bakery you didn’t get around to eating, spreading it with garlic butter and baking it until toasty is a great way to enjoy it!
- Have extreme garlic lovers in your household? Feel free to increase the amount of garlic in the garlic herb butter.
- The intensity of the garlic flavor will also be affected by how fresh your garlic is. If it’s been sitting around for a while it may have lost some of its pungency and you made need to use a bit more to get the same taste.
- Be sure to mince the garlic finely here. As much as I love garlic, I never want to bite into a giant hunk of crunchy garlic when I’m enjoying my bread. It’s best when it can almost melt into the fluffy interior of the bread along with the butter!
More Easy Side Dishes
- Beer Bread recipe
- Copycat Rice a Roni
- Sweet Potato Casserole
- Pesto Pasta
- Roasted Broccoli and Zucchini
- 7 Layer Salad
Pin this now to find it later
Pin It
Garlic Bread
Ingredients
- 1 French baguette
- ¼ cup olive oil
- 5 Tablespoons unsalted butter softened
- 2 ½ teaspoons minced garlic 5 cloves
- 2 Tablespoons parsley chopped
- ¼ teaspoon kosher salt
- 3 Tablespoons grated parmesan optional
Instructions
- Preheat oven to 375° and line a baking sheet with foil.
- Slice baguette into 1” slices.
- Make the garlic butter spread by mixing together olive oil, butter, garlic, parsley, salt and parmesan cheese (if using).
- Spread the butter mixture onto both sides of each slice of bread. Wrap loaf in the foil, leaving the top exposed so it gets toasted in the oven. Pour any remaining garlic butter over the top of the loaf.
- Bake until golden brown on top, about 9 to 10 minutes.
- Serve warm.
Notes
- The olive oil mixed with butter gives this a good, spreadable consistency, as well as adds a little depth to the flavor. You could make this with just butter – use ½ cup, or one stick, and omit the olive oil.
- Can you use a different type of bread? Sure you can – any French or Italian, rustic loaf style bread will work.
- Can you substitute garlic powder for the minced garlic? Yes, if you don’t have fresh garlic on hand, you can use garlic powder. I like the jarred minced garlic for convenience. Here’s how to substitute: 1 clove = ½ teaspoon minced = ⅛ teaspoon garlic powder. So for this recipe that would be ⅝ teaspoonful (½ + ⅛ teaspoon). Or use ½ to ¾ teaspoon of garlic powder, depending how garlic-y you like it.
Video
Nutrition
What are you waiting for? Go grab a baguette and turn it into delicious, fragrant, flavorful garlic bread! Your family will thank you.


Best garlic bread I’ve ever had!
This is the tastiest I’ve ever had!!! My new go to favorite!